


Things you need:
• A little bit of creative flair and time
• One pack of white diapers (Approximately 68 for a 3 tier cake)
• Rubber bands
• Receiving blankets (3 for a 3 tier cake) or scrapbook paper
• Cardboard large enough for the base
• Baby bottle
• Fabric glue
• Adhesive tape or double sided sticky tape or glue dots
• Colourful ribbons and bows
• Tissue paper
• Cake decorations: wooden characters, letters, flowers, feathers,etc.
• Netting or cellophane
Step 1: Select a colour scheme or a theme for your diaper cake
Before you start assembling the cake, you need to have a clear idea of what you want to do- is there a particular party theme that you want to follow, is there a specific colour scheme that you want to work with? Still not sure - click here to view this wonderful gallery of diaper cakes that hopefully will inspire you.
Step 2: Building the cake - one tier at a time
Take the cardboard base (or the cake platter) and place a large bottle of baby lotion in the centre. I personally used three different sizes of pans to shape the layers.Then place about 30 diapers around the bottle and put a large rubber band around the entire ring of diapers. There are two ways of rolling up the diapers:
1. To form the top of the diaper cake, roll up a diaper, starting at the 'open' top end. Wrap a rubber band around the rolled diaper to stop it from unrolling.
2. An alternative to rolling up each diaper is to place the diapers side-by-side and form a rolling circle.
Repeat this with the second and top layers. The top layer will only be 1 circle of diapers. If you don’t want your diapers to be visible, you can wrap each layer with tissue paper.
Step 3: Decorate
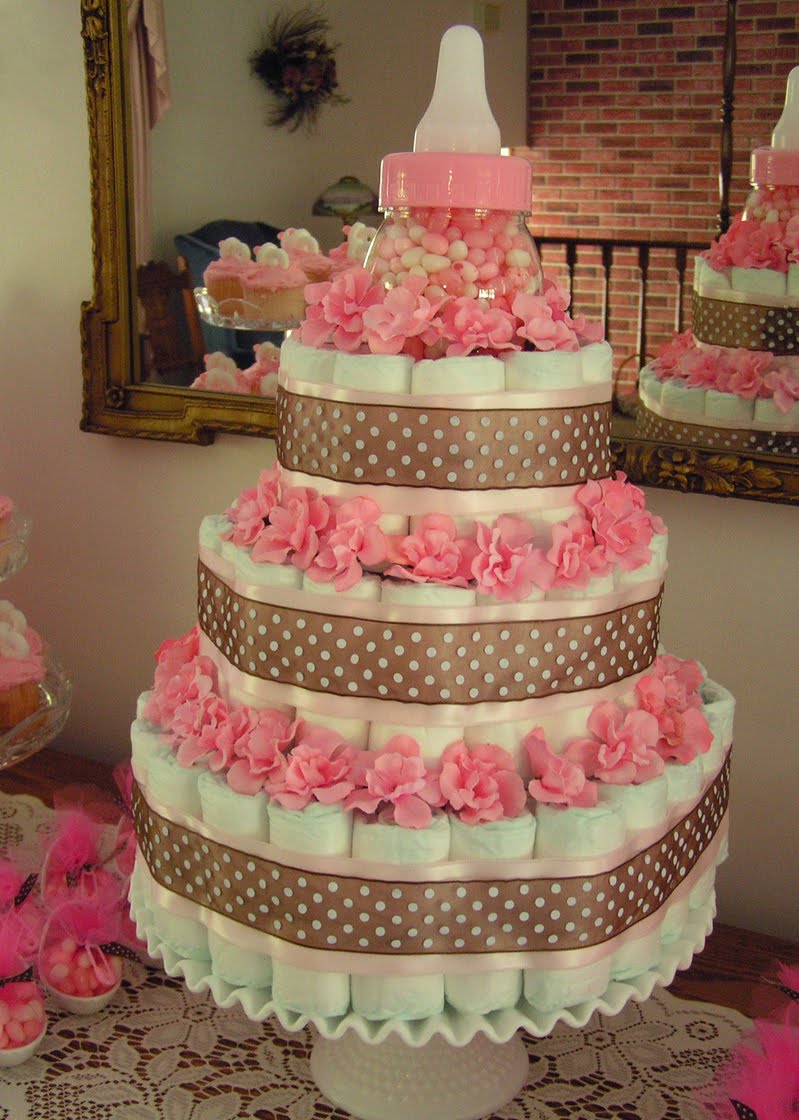
This is the fun part. Wrap each layer with a receiving blanket and secure with adhesive tape. Wrap each layer with a ribbon. I used two different sizes of ribbon that I glued together.
The top is the centerpiece. There are many items that you could choose for the top. I personally chose feathers and butterflies. You can place a toy, flowers, or a baby bottle. You can also hide gifts and place them in the centre of each layer to keep the cake steady (i.e.: pacifiers, washcloths, onesies, mittens, socks and other baby supplies)
If a budget is an issue, you can do one layer of cake and use a cake stand or a box or do washcloth cupcakes.
For those who wish to see the video tutorial, click here.
Here are some fabulous diaper cakes for your inspiration.


Here are some fabulous diaper cakes for your inspiration.


Sourcing: Cake 1, Cake 2, Cake 3
I just have to tell you that your diaper cake is just adorable!
ReplyDeleteI love the diaper cake,when my daughters decide to have a family this is the cake I want for their baby shower.And if it is A boy we will just have to rearrange the colors a little bit.Terribly cute and I love it,and will be the proud G'ma one day and will be preparing these things and I promise to the world and my self this cake WILL BE THERE...True Talent in that cake !!
ReplyDeleteThanks you for your lovely comments, everyone.
ReplyDeleteRcedutalent
ReplyDeleteRcedutalent
Rcedutalent
Rcedutalent
Rcedutalent
Copperchips is Leading Node.Js Development Company that develops cloud native digital products for both web and mobile platforms and is led by a team of industry experts who cultivate a culture of inclusion and innovation, whilst challenging the status quo.
ReplyDeleteThank you very nice sharing.
ReplyDeleteTransform your payment processing with WebPays, a leader among top credit card processors . Streamline transactions seamlessly and securely with our advanced solutions tailored to your business needs. Trust WebPays for reliable credit card processing that enhances customer satisfaction and operational efficiency. Benefit from our robust technology and expert support, ensuring smooth financial transactions every time. Contact us today to elevate your business with WebPays.
ReplyDeleteI love how creative this project seems.
ReplyDeleteWhen I first heard that we had to move in Raj Nagar Ghaziabad, my mind immediately raced with all the things that could go wrong during the move—broken items, delayed trucks, hidden charges, and the sheer stress of packing everything we owned. Then I searched online for moving service provider companies, I found HomeShiftingWale Packers and Movers in Raj Nagar Ghaziabad, which offered the best services.
ReplyDeleteIf you finding the top-rated packers and movers in Kaushambi or any other city in India, Here I suggest you the top-notch moving services provider- HomeShiftingWale packers and movers is well-known for their reliability and professionalism.
ReplyDeleteVasundhara is such a crowded and fast-growing area in Ghaziabad, and while it’s well connected, managing a move here felt like a big task. Then I realized how crucial to choose the right Packers and Movers in Vasundhara. Finally, I chose HomeShiftingWale packers and movers' team; their team listens, communicates well, and handles your belongings like their own. In Vasundhara, there are many options, but not all offer the same level of professionalism as compared to HomeShiftingWale.
ReplyDeleteIf you’re relocating in or out of sector 62 Noida, you can trust me—do your homework, talk to a few companies, then pick HomeShiftingWale packers and movers sector 62 noida who value your peace of mind as much as your stuff.
ReplyDeleteAre you looking for reliable Packers and Movers in Sector 63 Noida for your office shifting, As my point of view- you can contact HomeShiftingWale packers and movers for your safe and smooth shifting.
ReplyDeleteGreat insights on modern restaurant technology! As someone who's researched various solutions, I've found that Restaurant Cloud Based POS Software offered by itsws has truly revolutionized how food service businesses operate.
ReplyDeleteEducation ERP Software transformed our school operations completely. Student records, staff management, and financial tracking all integrated seamlessly.
ReplyDeleteGreat article! ITSWS Real Estate CRM Software helps agents manage leads, track deals, and improve client relationships effortlessly.
ReplyDelete